Velocity Lapse User Guide
Last updated 6/18/2024 (Currently incomplete)
Intro
Velocity Lapse is a fully-featured tool to create stunning time-lapse videos with your mobile device. This guide goes over the main features and interface elements of Velocity Lapse so that you can use the app to its full potential.
Tip: Long pressing on most interface elements will bring up a tooltip.
Note: This guide currently assumes you are using the PRO version.
TODO: mark PRO features.
Capture Modes
You can choose between two capture modes, each with specific features designed for creating different types of time-lapses.
Timelapse Mode
Capture time-lapses using a set interval to capture images automatically, with an optional frame limit, delay, and other features.
Create beautiful time-lapses of subjects like clouds, sunrises, sunsets, city life, studying, art processes, and more. Watch the changes of the world around you over time, condensed into a few seconds through time-lapse photography.
Photolapse Mode
Capture photos individually to create a time-lapse of an event happening over an extended period of time without leaving your device on location.
At an interval you choose, line up the last image with the previous photo, capture a photo, and repeat.
Photolapse mode is great for capturing time-lapses of long events like construction projects or plant growth that can last over weeks, months, or even years. It can also be used for hyper-lapses or stop-motion.
Home Screen
Top-bar
The top-bar contains buttons that are shown across tabs for easy access. In order from left to right:
PRO Upgrade Button
Shown only in the free version of Velocity Lapse, tapping this button displays the PRO upgrade screen where you can purchase the PRO version of Velocity Lapse.
Storage Selector Button
Displays how much storage is remaining at the current storage location. The storage location is where your projects and time-lapse images will be saved. By default, the storage location is set to your device internal storage. Tapping on the Storage Selector brings up a menu to choose between internal and, if an SD card is inserted and mounted, external storage.
Settings Button
The  button opens the settings screen.
Tabs
At the bottom of the screen are four tabs, separating the functionality of Velocity Lapse. In order from left to right:
Timelapse Tab
Upon opening Velocity Lapse, you will see the contents of the Timelapse tab. This tab is where you can manage your Timelapse mode projects and create new Timelapse projects.
Photolapse Tab
The Photolapse tab is where you can manage your Photolapse mode projects and create new Photolapse projects.
Import Tab
The Import tab allows you to select images captured with an external camera (DLSR, GoPro, etc.) from your device gallery to import as a new Timelapse project.
Gallery Tab
The Gallery tab is where you can view and manage videos that you have exported from Velocity Lapse.
Creating Projects
For both Timelapse and Photolapse mode, you can create a new project by tapping on the large, blue New Timelapse or New Photolapse buttons, respectively.
If the Ask For A Project Name setting is enabled in settings, you will be prompted to give a name when creating new projects. Otherwise, a default project name will be set.
Project Management
Both Timelapse and Photolapse mode have a similar interface for managing projects.
Each project is shown with a thumbnail of the most recent image, the name of the project, the date the project was last edited, the number of capture images (frames), the image resolution, and icons to indicate whether it is an imported project and/or if the project has been exported to video or an image sequence.
The icon indicates that the project was created by importing images.
The icon (single check-mark) indicates that the project has been exported to either video OR an image sequence.
The icon (double check-marks) indicates that the project has been exported to both video AND an image sequence.
Project Options
Tapping on the three dots button brings up a menu to rename the project or delete the project and images permanently.
Sorting Projects
You can sort the ordering of the project by tapping the sort button .
Photolapse Projects
For Photolapse projects, tapping the Capture Photo button shows the Photolapse screen where you can capture another photo to add to the project.
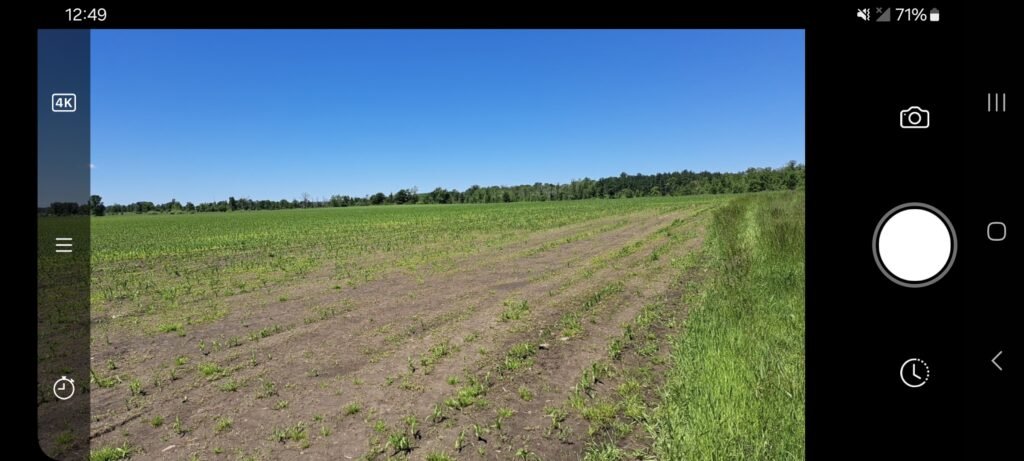
Timelapse Screen
The Timelapse mode screen allows you to create time-lapses using a set interval.
Timelapse Top Bar
In Timelapse mode, at the bottom of the screen (or at the left side of the screen when in landscape orientation) is the top bar. From left to right (or bottom to top in landscape mode):
Time Delay Before Start
Delay up to 1 minute before actually starting the capture after the capture button is tapped. This is useful for avoiding capturing shake and bumps of the phone when turning off the screen, etc. immediately after starting the capture.
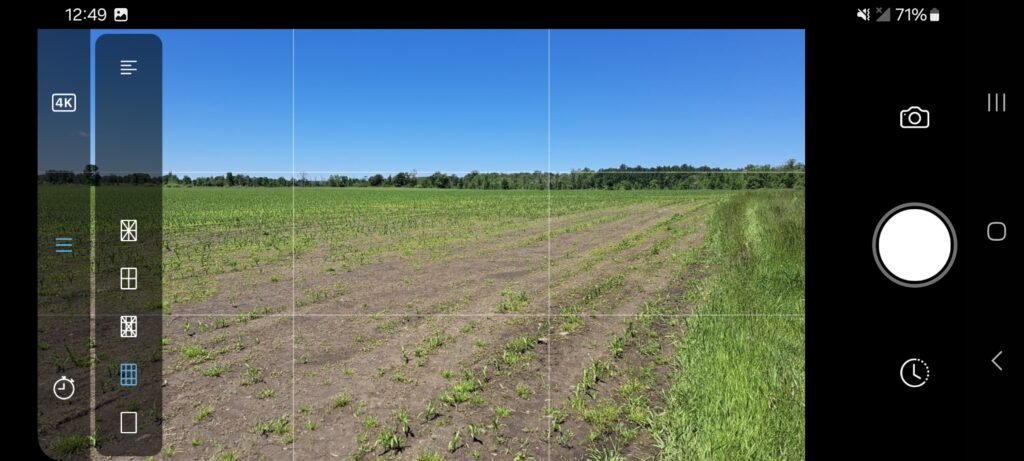
Display Options
Switch between 4 different camera grid styles, or turn the grid off.
Toggle showing capture info onscreen even when the capture settings are not shown.
Capture Resolution
Change the resolution of the captured photos from preset options. If the selected resolution preset is not available on the device, it will automatically drop down to the closest supported resolution. Max available resolution looks for the highest supported resolution available to third-party devices.
Timelapse Bottom Bar
In Timelapse mode, at the bottom of the screen (or at the right side of the screen when in landscape orientation) is the bottom bar. From left to right (or bottom to top in landscape mode):
Capture Settings Button
Opens the Capture Settings.
Capture Button
Starts the Timelapse capture.
Camera Settings Button
Opens the Camera Settings.
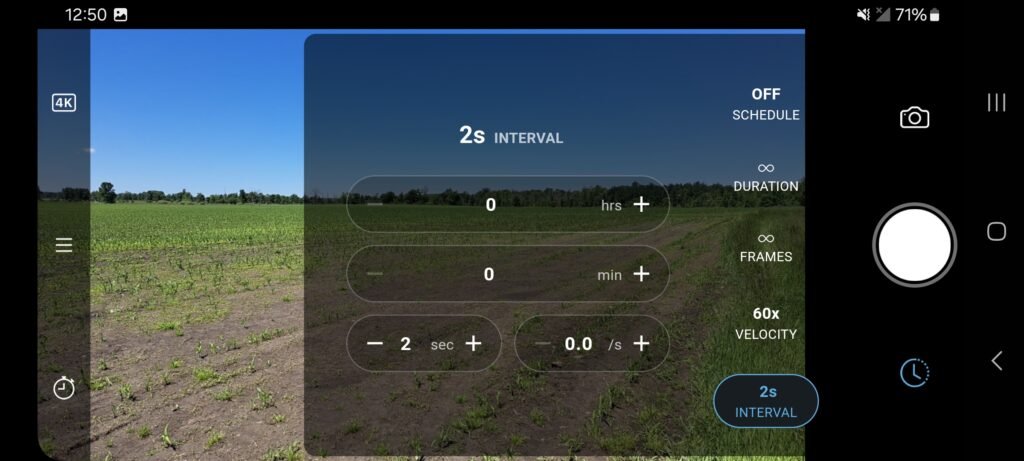
Timelapse Capture Settings
The Timelapse capture settings is where you can control the speed and length of your time-lapse.
TODO
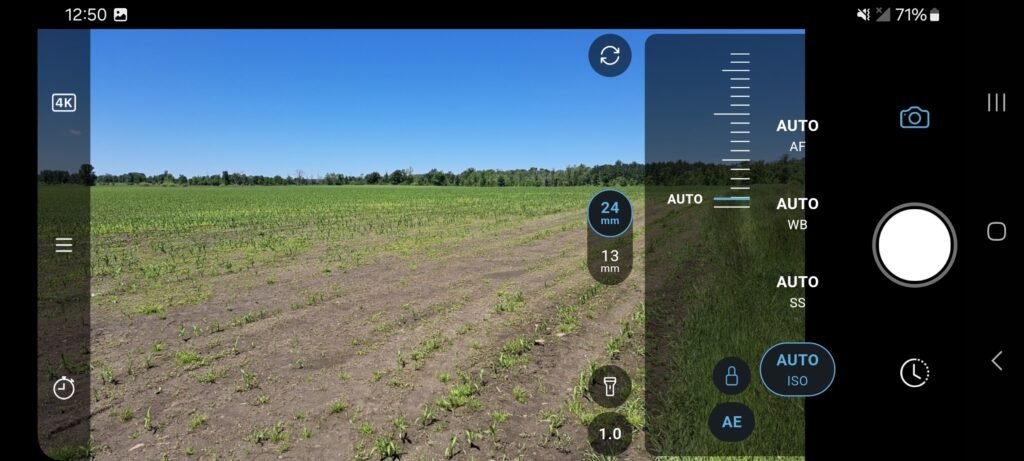
Timelapse Camera Settings
TODO
Photolapse Screen
The Photolapse mode screen allows you to create time-lapses, hyper-lapses or stop-motion animations by capturing individual photos yourself.
Photolapse Bottom Bar
In Photolapse mode, at the bottom of the screen (or at the side of the screen when in landscape orientation) is the bottom bar. From left to right:
Previous Frames
Tap to open the current project in the Editor screen. A thumbnail of the last captured photo and the total number of photos in the Photolapse project is displayed.
Capture Resolution
Change the resolution of the captured photos from preset options. If the selected resolution preset is not available on the device, it will automatically drop down to the closest supported resolution. Max available resolution looks for the highest supported resolution available to third-party devices.
Capture Button
Capture a photo.
Camera Settings Button
Opens the Camera Settings.
Photolapse Settings Button
Opens the Photolapse Settings.
Photolapse Camera Settings
Starting from the top left to right:
Zoom
Control the camera zoom.
Lenses
Switch between the camera lenses that are available to third-party apps. Lenses are displayed for the current camera direction.
Flip Camera Direction
Flip the direction of the current camera, from back to front or front to back.
Exposure Value
The EV (exposure value) slider adjusts the camera auto exposure, making the image brighter or darker.
Photolapse Settings
Starting from the top left to right:
Camera Grid Options
Switch between 4 different camera grid styles, or turn the grid off.
Camera Marker
Toggle displaying a movable marker that will persist in the same spot each time you open the camera to capture a photo. Simply tap and drag to set the marker position. The marker is especially useful for keeping track of a specific point in view when creating hyper-lapses.
Overlay Opacity
Change the opacity of the previous photo that is placed over the camera preview.
Editor Screen
The editor displays all of the captured images for the project. You can preview your time-lapse at ~14fps, delete individual frames (images), and import/export.
Import
Velocity Lapse can import images from your gallery as a new project, or into an existing project. The PRO version allows you to import more than 400 images at one time.
As A New Project
To import images from your gallery as a new project, navigate to the Import tab and tap one of the buttons to select either a folder of images or individual images.
Select Folder
Choose a folder on your device or SD card to import as a new Timelapse project.
Select Images
Choose individual images from your photo gallery to import as a new Timelapse project. Please note that the Android image picker is not meant for thousands of images and it will crash if you try. Instead, to import large amounts of images, please use Select Folder.
Into An Existing Project
To import images from your gallery into an existing project, tap an existing project to open it in the Editor, and find the Import button near the bottom of the screen (portrait orientation only). Then tap one of the buttons to select either a folder of images or individual images.
The imported images will be added after the last image of the existing project.
Export
Velocity Lapse can export to either MP4 video or a JPG image sequence.